
Best Winter Kale Varieties to Plant in July UK: Hardy Cultivars for Fresh Winter Greens
We earn commission from qualifying Amazon purchases. It costs you nothing and does not affect what we recommend.
July is the perfect time to sow winter kale varieties in the UK. Discover the hardiest cultivars including Cavolo Nero, Redbor, and Dwarf Green Curled that will provide fresh, nutritious greens throughout the coldest months. Complete growing guide with expert tips for successful winter harvests.
July marks a crucial window for UK gardeners to establish winter kale crops that will provide fresh, nutritious greens throughout the coldest months. As summer vegetables begin to wind down, forward-thinking gardeners are already planning their winter harvests by sowing hardy kale varieties that thrive in Britain's challenging winter conditions.
Winter kale varieties are specially bred to withstand frost, snow, and the short daylight hours of British winters. These remarkable plants not only survive but actually improve in flavour after experiencing frost, making them invaluable for maintaining fresh produce during the lean winter months when shop-bought alternatives are expensive and often travel thousands of miles.
The timing of July planting is perfect - it allows kale plants to establish strong root systems and develop robust foliage before the first frosts arrive, ensuring they're well-prepared for the challenges ahead.
Why Plant Winter Kale in July?
July planting provides the optimal timing for winter kale success in the UK climate. During this period, soil temperatures remain warm enough for reliable germination, typically between 15-20°C, whilst giving plants a full 3-4 months to establish before winter arrives.
Young kale plants need this extended growing period to develop the deep root systems and thick, waxy leaves that enable them to survive freezing temperatures. Plants sown too late in August or September often struggle to develop sufficient resilience, resulting in poor winter survival rates and reduced harvests.
The long summer days of July also provide maximum photosynthesis hours, allowing seedlings to build energy reserves crucial for winter survival. As daylight hours begin to shorten from late July onwards, established plants can redirect their energy from rapid growth to developing the protective characteristics needed for cold weather tolerance.
Additionally, July planting avoids the peak cabbage white butterfly season (typically May-June), reducing the risk of caterpillar damage that can devastate young brassica plants. By July, these pest pressures naturally decrease, giving your kale seedlings a better chance of healthy establishment.
Top Hardy Winter Kale Varieties for UK Gardens
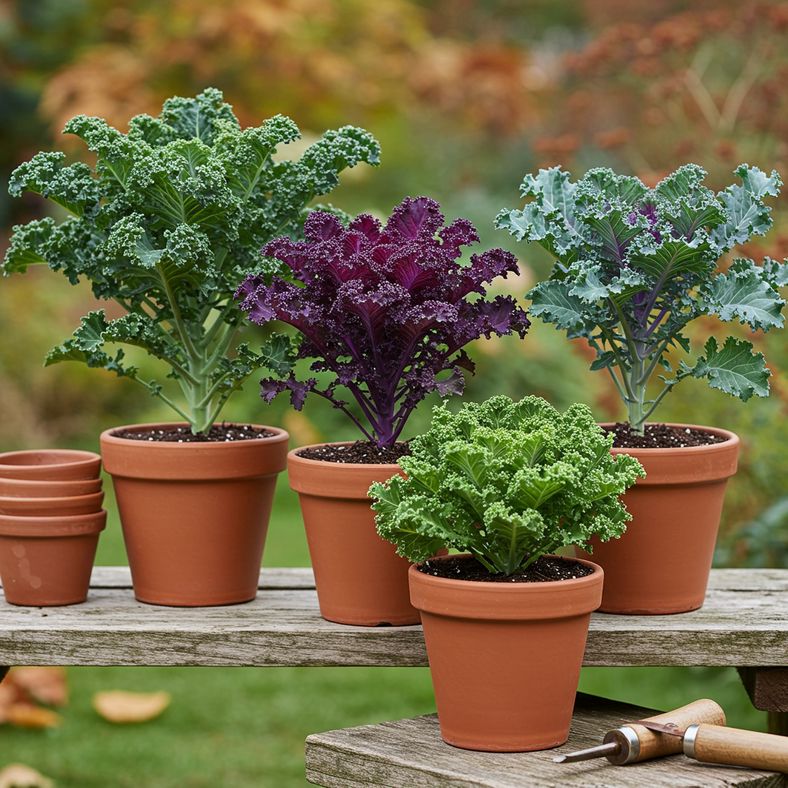
Selecting the right varieties is crucial for winter success. The following cultivars have proven themselves in British conditions, offering exceptional cold tolerance whilst providing diverse flavours, textures, and visual appeal throughout the winter months.
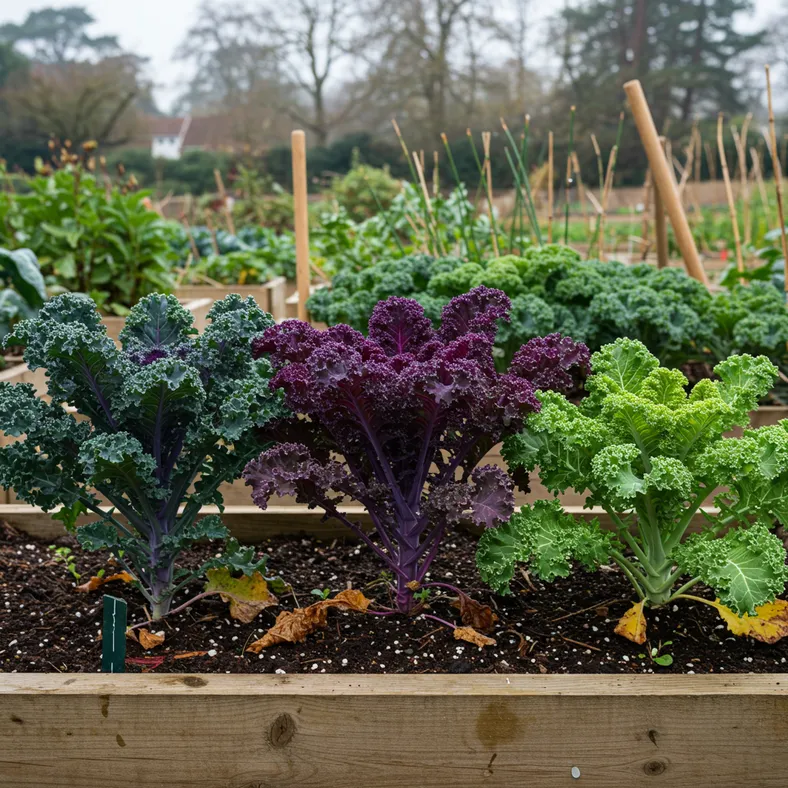
Cavolo Nero (Black Tuscan Kale)
Perhaps the most renowned winter kale, Cavolo Nero has earned its reputation through centuries of cultivation in harsh mountain climates. This Italian heirloom variety produces distinctive dark blue-green leaves with a heavily puckered texture that becomes increasingly pronounced in cold weather.
The narrow, strap-like leaves can withstand temperatures as low as -15°C, actually improving in sweetness and tenderness after frost exposure. Plants typically reach 60-90cm in height, producing leaves continuously from October through to April when properly established.
Cavolo Nero's exceptional flavour profile - slightly bitter when young, developing nutty sweetness after frost - makes it invaluable for winter cooking. The sturdy leaves hold their structure well in soups, stews, and braises, whilst young leaves can be used raw in winter salads.
Redbor F1 Hybrid
This striking purple-red variety combines exceptional hardiness with outstanding ornamental value, making it perfect for gardeners wanting productive plants that enhance winter garden aesthetics. Redbor's deeply frilled leaves develop intense burgundy colouration as temperatures drop, creating dramatic visual impact.
The plant's compact, sturdy growth habit (typically 45-60cm tall) makes it excellent for smaller gardens and containers. Despite its decorative appearance, Redbor is remarkably hardy, tolerating temperatures down to -12°C whilst maintaining good leaf quality.
The leaves offer a mild, sweet flavour that appeals to children and kale newcomers. Young purple leaves add spectacular colour to winter salads, whilst mature leaves retain their vibrant hue when lightly cooked, making them perfect for colourful winter side dishes.
Dwarf Green Curled
This compact variety represents the classic curly kale appearance whilst offering practical advantages for smaller spaces and container growing. Plants typically reach only 30-45cm in height but produce dense clusters of tightly curled, bright green leaves.
The variety's exceptional cold tolerance (surviving temperatures to -10°C) combines with its space-efficient growth habit to make it ideal for urban gardens, allotments with limited space, and large containers. The compact size also makes harvesting easier during winter weather.
Dwarf Green Curled produces tender leaves perfect for winter salads when harvested young, or substantial cooking greens when allowed to mature. The tight curl structure holds seasonings and dressings well, making it excellent for winter coleslaws and massaged kale salads.
Winterbor F1
Specifically bred for winter production, Winterbor represents modern plant breeding focused on cold tolerance and consistent winter performance. This variety produces large, deeply curled blue-green leaves on sturdy plants reaching 45-60cm tall.
The hybrid vigour provides exceptional uniformity and disease resistance, whilst the specially selected parent lines ensure reliable performance in challenging winter conditions. Plants can withstand sustained periods below -8°C whilst continuing to produce harvestable leaves.
Winterbor's leaves maintain excellent texture and colour throughout winter, with a sweet, mild flavour that intensifies after frost exposure. The consistent leaf production makes it particularly valuable for regular winter harvesting.
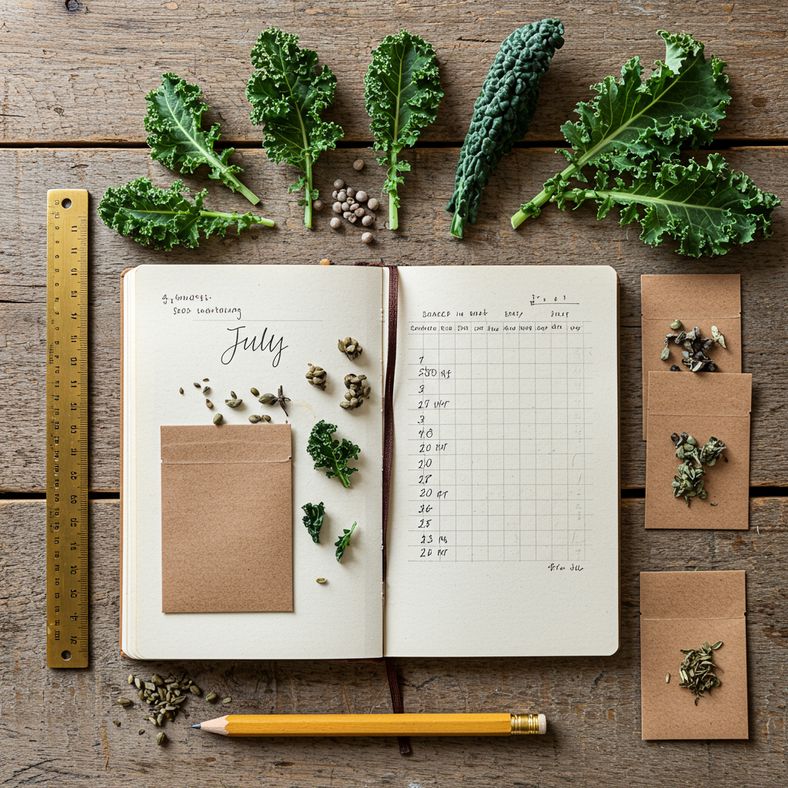
July Planting Method for Winter Kale
Successful winter kale begins with proper July sowing techniques that ensure strong plant establishment before autumn weather arrives. The method you choose depends on available space, soil conditions, and personal preference, but all approaches share common principles for success.
Outdoor Direct Sowing
Direct sowing in July allows plants to develop undisturbed root systems, often resulting in stronger, more cold-tolerant plants. Choose a sunny to partially shaded location with well-drained soil that has been enriched with well-rotted compost or manure.
Create shallow drills approximately 1cm deep, spacing rows 45-60cm apart depending on variety. Sow seeds thinly along the drill, then cover lightly with fine soil. Water gently using a fine spray to avoid displacing seeds.
Germination typically occurs within 7-14 days in July's warm soil conditions. When seedlings reach 5-7cm tall, thin to final spacings: 30cm apart for compact varieties like Dwarf Green Curled, 45cm for medium varieties like Redbor, and 60cm for large types like Cavolo Nero.
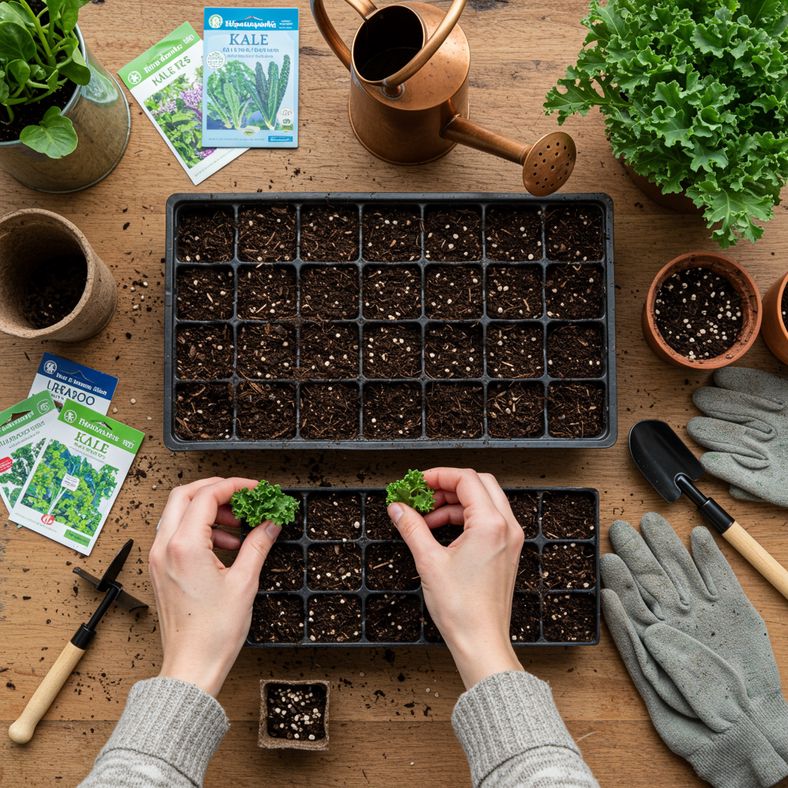
Modular Tray Sowing
Sowing in modular trays provides greater control over early growth whilst protecting vulnerable seedlings from slugs, snails, and adverse weather. This method particularly suits gardeners with heavy or poorly-drained soils that may cause seed rot in wet July weather.
Fill modular trays with quality peat-free seed compost, water thoroughly, then sow 2-3 seeds per module at 1cm depth. Place in a bright, sheltered location - a cold frame, unheated greenhouse, or protected outdoor area works well.
Keep compost consistently moist but not waterlogged. When seedlings emerge, remove weaker plants to leave one strong seedling per module. Begin hardening off after 4-5 weeks, then transplant to final positions when plants reach 10-15cm tall, typically in late August or early September.
Seedbed Method
This traditional approach involves sowing seeds in a dedicated nursery area before transplanting to final growing positions. It's particularly useful when main growing areas are occupied by summer crops that won't be cleared until late summer.
Prepare a fine seedbed in a sheltered location with good drainage. Sow seeds in short rows 15cm apart, covering lightly with fine soil. Keep well-watered and weed-free throughout the growing period.
Transplant seedlings to their final positions when they reach 10-15cm tall and have developed 4-6 true leaves. This typically occurs 6-8 weeks after sowing, perfect timing for early September planting when summer crops are finishing.
Soil Preparation and Site Selection
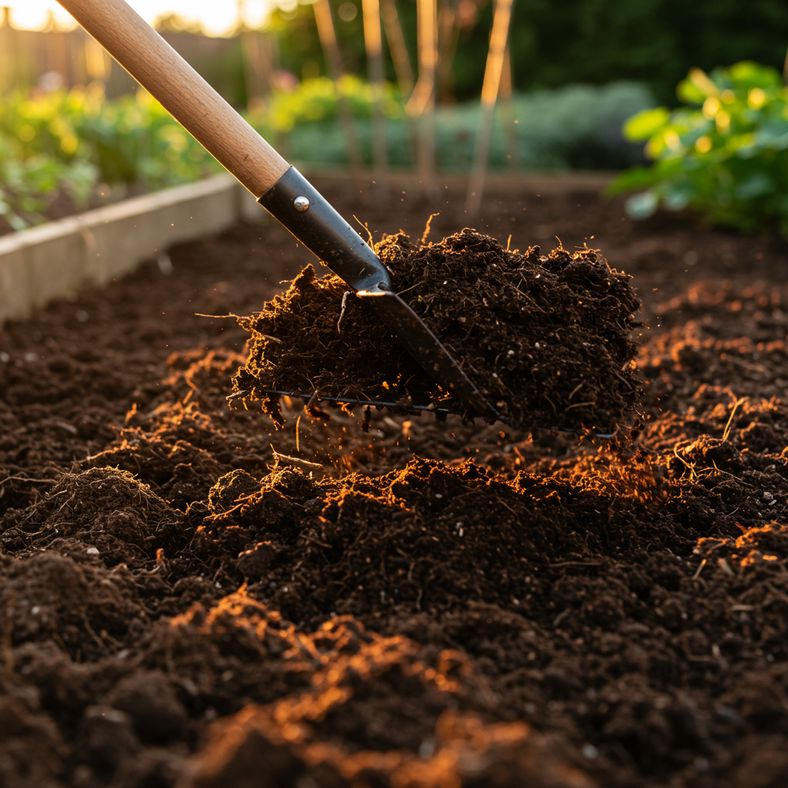
Winter kale's exceptional performance depends heavily on proper soil preparation during July when conditions are ideal for soil improvement work. These hardy plants will occupy their growing positions for 8-10 months, making thorough preparation essential for sustained production.
Soil Requirements
Kale thrives in firm, well-drained soil with a pH between 6.0-7.5. The 'firm' aspect is crucial - unlike many vegetables that prefer loose, fluffy soil, kale needs solid ground to anchor its extensive root system and support the large, heavy leaf canopy that develops over winter.
Test soil drainage by digging a hole 30cm deep and filling with water. If water remains after 24 hours, improve drainage by incorporating coarse grit, sharp sand, or well-rotted organic matter. Waterlogged soil in winter leads to root rot and plant failure.
For heavy clay soils, work in plenty of well-rotted manure or compost during July preparation, allowing several weeks for the organic matter to integrate before planting. Sandy soils benefit from organic matter addition to improve water retention during the establishment period.
Site Selection
Choose the most sheltered position available whilst ensuring good light levels. Winter kale tolerates partial shade but produces better quality leaves and shows improved cold tolerance when grown in full sun during the establishment phase.
Avoid exposed sites where winter winds can damage plants or create wind-chill effects that reduce cold tolerance. A position with natural windbreak protection from fences, hedges, or buildings provides ideal conditions whilst maintaining good air circulation.
Consider crop rotation principles when selecting sites. Kale belongs to the brassica family and should not follow other brassicas (cabbage, cauliflower, broccoli, radishes, turnips) to prevent disease build-up, particularly clubroot which can persist in soil for many years.
Preparation Steps
Begin soil preparation 2-3 weeks before sowing to allow soil to settle. Remove all weeds, particularly perennial types like dock, dandelion, and bindweed that compete strongly with establishing kale plants.
Dig the area thoroughly to spade depth (approximately 25cm), incorporating 5-7.5cm of well-rotted manure or compost per square meter. This provides slow-release nutrients throughout the long growing season whilst improving soil structure.
After digging, rake the surface level and firm gently by walking over the area with small steps. The final surface should be firm enough that footprints barely show, yet fine enough for easy seed germination.
Essential Care Through Summer and Autumn
The critical period between July sowing and first frosts determines winter kale success. Consistent care during establishment builds the plant strength needed to withstand months of challenging weather whilst producing continuous harvests.
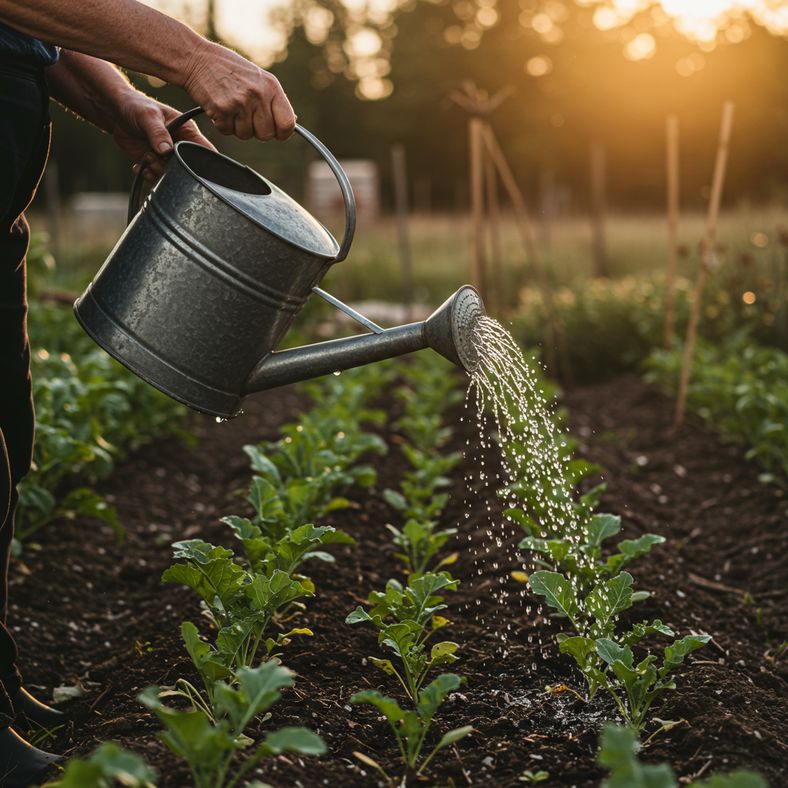
Watering Management
Newly sown seeds and young seedlings require consistent moisture during July's potentially dry conditions. Water daily if necessary during hot weather, applying water gently to avoid disturbing developing roots. A fine spray attachment or watering can rose prevents soil displacement around fragile seedlings.
As plants establish through August and September, reduce watering frequency but increase quantity per application. Deep, infrequent watering encourages extensive root development that improves winter hardiness. Aim to provide 2.5cm of water weekly during dry periods, applied in 1-2 thorough sessions rather than daily light applications.
Monitor soil moisture levels by inserting a finger 5cm into the soil near plants. If dry at this depth, watering is needed. Container-grown plants require more frequent attention as pots dry out faster than ground soil, particularly during late summer heat.
Nutrition and Feeding
Kale's extended growing season demands sustained nutrition, but feeding requirements change as plants transition from establishment to winter survival mode. During July and August, focus on supporting rapid leaf development with nitrogen-rich feeding.
Apply a balanced liquid fertilizer every 2-3 weeks during the establishment phase, using a formulation such as 10-10-10 or similar balanced NPK ratio. This supports both root development and leaf production essential for building winter reserves.
From September onwards, reduce nitrogen feeding to prevent soft growth that's susceptible to frost damage. Switch to phosphorus and potassium-rich feeds that promote root development and cold tolerance. A final feed in early October with high-potassium fertilizer helps plants prepare for winter dormancy.
Pest Protection
Young kale plants face numerous pest challenges during the vulnerable establishment period. Implementing protection strategies from the outset prevents damage that weakens plants before winter arrives.
Cabbage white butterflies remain active through August and early September, laying eggs that develop into leaf-eating caterpillars. Cover plants with fine insect mesh immediately after planting, ensuring edges are buried or weighted to prevent pest entry.
Slug and snail damage can devastate young plants, particularly during wet August weather. Apply organic slug pellets around plants or use beer traps positioned 2-3 meters away to lure pests from the growing area. Regular evening patrols with removal by hand provides effective control without chemicals.
Flea beetles create characteristic small holes in young kale leaves, weakening plants during the critical establishment phase. Insect mesh provides excellent protection, whilst regular watering reduces beetle activity as they prefer dry soil conditions.
Harvesting Your Winter Kale Crop
Winter kale harvesting differs significantly from summer vegetables, requiring techniques that maintain plant productivity throughout the long winter period whilst ensuring continuous supplies of fresh greens during the months when other vegetables are scarce.
When to Begin Harvesting
Most July-sown winter kale reaches harvesting size by early to mid-October, depending on variety and growing conditions. However, many gardeners find that waiting until after the first frost produces superior flavour as cold temperatures convert starches to sugars, reducing bitterness and increasing sweetness.
Begin harvesting when lower leaves reach 15-20cm in length for cooking varieties, or 10-15cm for salad types. The key indicator is leaf maturity rather than plant size - mature leaves have fully developed texture and colour characteristic of their variety.
For salad harvesting, begin when plants reach 10-15cm tall overall, typically 8-10 weeks after sowing. Cut-and-come-again harvesting at this stage provides tender leaves perfect for winter salads whilst encouraging continued production.
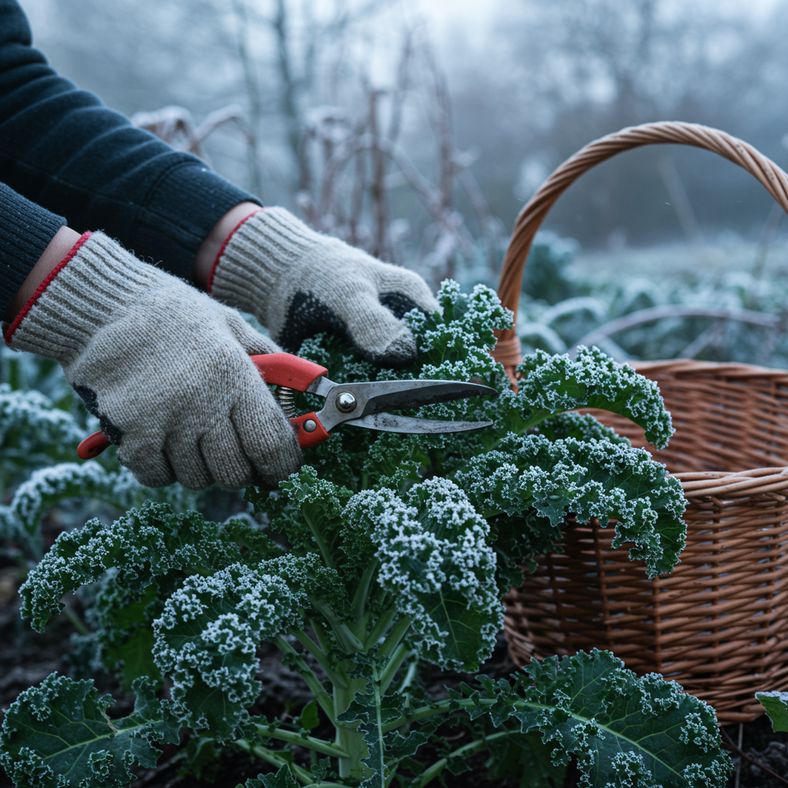
Proper Harvesting Techniques
Always harvest from the bottom of the plant upwards, removing the oldest, largest leaves first. This allows the growing point to continue producing new leaves whilst preventing older foliage from becoming tough and bitter.
Use clean, sharp scissors or secateurs to make clean cuts approximately 2.5cm above soil level, avoiding damage to the central growing point. Quality garden secateurs make harvesting easier and reduce plant stress through clean cutting action.
Harvest regularly throughout winter, removing 2-3 leaves per plant every 1-2 weeks depending on growth rate and household requirements. Regular harvesting encourages continued production and prevents leaves from becoming oversized and tough.
During severe cold periods, harvesting may pause as growth slows dramatically. Plants remain dormant but alive, resuming production when temperatures moderate, often providing fresh leaves well into April.
Post-Harvest Handling
Fresh-picked winter kale stores best when harvested during cool parts of the day, ideally early morning when leaves are fully hydrated. Avoid harvesting during or immediately after rain when leaves are wet and prone to rapid deterioration.
Store harvested leaves in the refrigerator for up to one week, wrapped in damp paper towels and placed in plastic bags. For longer storage, blanch leaves in boiling water for 2-3 minutes, then freeze in portions for convenient winter cooking.
Winter kale's exceptional nutritional density makes it particularly valuable during months when fresh, locally-grown vegetables are scarce. A single plant can provide harvests for 4-6 months, making July planting exceptionally productive for the space and effort invested.
Maximising Cold Tolerance and Winter Performance

Winter kale's legendary hardiness doesn't happen automatically - specific techniques during autumn preparation and winter management significantly improve cold tolerance whilst extending the productive harvest period throughout the challenging winter months.
Autumn Hardening Strategies
Begin hardening preparations in early September by reducing watering frequency to encourage deeper root development. Plants with extensive root systems better access nutrients and moisture during winter when surface soil may be frozen for extended periods.
Stop nitrogen feeding by mid-September to prevent soft growth that's susceptible to frost damage. The last nitrogen application should be 6-8 weeks before expected first frosts, allowing plants to redirect energy from rapid growth to developing protective compounds in leaves and stems.
Apply a final feed of high-potassium fertilizer in early October to boost cold tolerance. Potassium strengthens cell walls and increases the concentration of sugars and other compounds that act as natural antifreeze, significantly improving survival rates during severe cold periods.
Allow natural temperature fluctuations to gradually acclimatize plants rather than providing artificial protection too early. Plants exposed to gradually declining temperatures develop better cold tolerance than those suddenly exposed to harsh conditions.
Winter Protection Methods
While winter kale varieties are remarkably hardy, strategic protection during extreme weather can mean the difference between survival and thriving productivity throughout winter.
Install windbreaks around exposed plantings using horticultural fleece, bamboo screening, or temporary structures made from garden canes and clear plastic sheeting. Wind protection is often more valuable than temperature protection, as wind chill can damage even hardy varieties.
Apply thick mulches around plants in late November using straw, shredded leaves, or well-rotted compost. Mulching insulates roots from temperature fluctuations whilst providing slow-release nutrients as organic matter decomposes throughout winter.
During severe cold snaps (temperatures below -10°C), cover plants temporarily with fleece or cloches. Remove protection as soon as temperatures moderate to prevent soft growth that reduces natural cold tolerance.
Extending the Harvest Season
Succession planting extends the winter harvest period and ensures continuous supplies of different growth stages throughout the cold months. Sow a second batch of quick-maturing varieties like Dwarf Green Curled in late July or early August for harvesting from November onwards.
Plant different varieties with varying maturity dates and cold tolerance levels. Early varieties like Redbor provide harvests from October, whilst ultra-hardy types like Cavolo Nero continue producing into April, creating overlapping harvest periods.
Protected growing using cold frames, polytunnels, or cloches allows continued harvesting even during the coldest weather. Simple protection can advance harvesting by 2-3 weeks in autumn and extend it by similar periods in spring.
Consider companion planting with other winter-hardy vegetables to maximize growing space efficiency. Winter radish varieties and perpetual spinach complement kale plantings whilst providing diverse winter harvests from the same growing area.