
How to Harvest and Store Garlic in August UK: Complete Expert Guide
We earn commission from qualifying Amazon purchases. It costs you nothing and does not affect what we recommend.
August marks peak garlic harvesting season in the UK. Discover the essential signs that indicate your garlic is ready, learn proper harvesting techniques to avoid damage, and master proven storage methods that will keep your homegrown garlic fresh and flavourful for months to come.
August in the UK marks the peak season for harvesting garlic, particularly for spring-planted varieties that have been developing through the summer months. As the leaves begin their telltale yellowing and the bulbs reach full maturity, gardeners across Britain are preparing for one of the most rewarding harvests of the growing season.
Knowing precisely when and how to harvest your garlic can mean the difference between bulbs that store successfully for months and those that deteriorate within weeks. This comprehensive guide will walk you through every step of the harvesting and storage process, ensuring you maximize both the flavour and longevity of your homegrown garlic crop.
Identifying the Perfect Harvest Time
The key to successful garlic storage begins with harvesting at precisely the right moment. In August, your garlic plants will display clear visual indicators that the bulbs are ready for harvest.
Primary harvest indicators include:
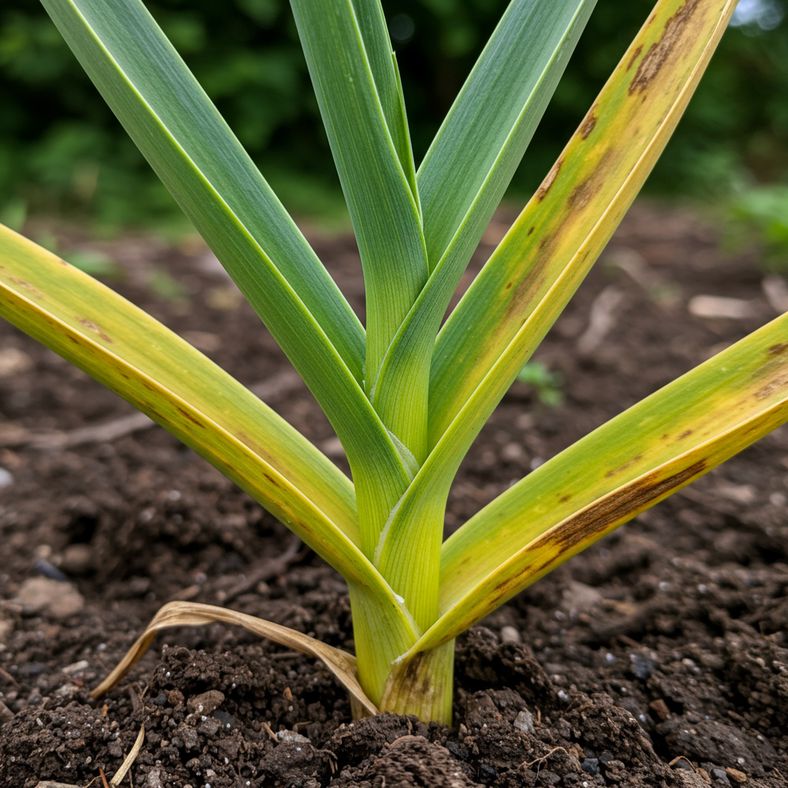
- Yellowing leaves: When approximately two-thirds of the leaves have turned yellow or brown, your garlic is ready
- Weakening foliage: The leaves will begin to fall over and lose their rigid structure
- Dry lower leaves: The bottom leaves should be completely dry and papery
- Bulb development: You should be able to feel firm, well-formed bulbs when gently pressing the soil around the plant
For spring-planted garlic in the UK, August typically represents the optimal harvest window. Autumn-planted varieties may have been harvested earlier in July, but some late-maturing varieties can extend into August.
Important timing considerations:
Don't delay once the signs appear - garlic harvested too late tends to split and won't store as well. Conversely, harvesting too early results in smaller bulbs with poor storage potential. The sweet spot is when leaves are yellowing but haven't completely died back.
Weather conditions also play a crucial role. If August brings particularly wet weather, prioritize harvesting before prolonged rain can encourage rot or cause the bulb wrappers to deteriorate.
Proper Harvesting Technique
The harvesting technique you use will significantly impact how well your garlic stores. Gentle handling is paramount to prevent bruising or damage that can lead to rot during storage.
Essential harvesting steps:
- Choose the right day: Harvest on a dry, sunny day when the soil isn't waterlogged. This makes lifting easier and starts the drying process immediately
- Loosen the soil: Use a garden fork to carefully loosen the soil around each bulb, working from about 15cm away to avoid piercing the bulbs
- Lift gently: Grasp the stem close to the bulb and lift straight up with steady pressure. Avoid pulling or twisting motions
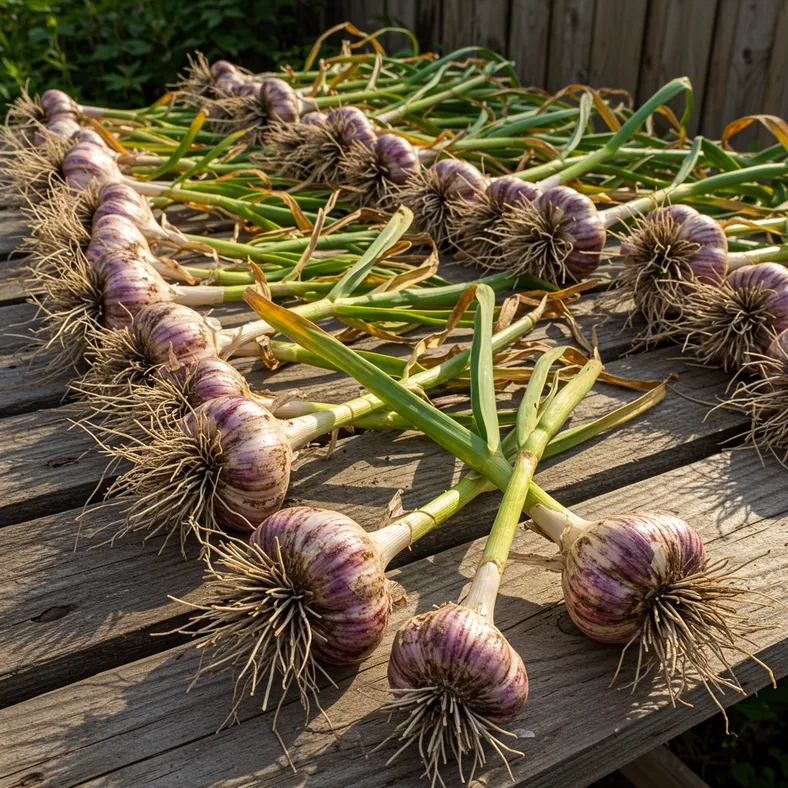
- Keep foliage attached: Don't remove the leaves immediately - they'll help with the drying process and can be used for plaiting later
- Handle with care: Place harvested bulbs gently in a basket or tray, avoiding drops or impacts that can cause invisible bruising
If you encounter resistance when lifting, return to loosening the soil rather than forcing the bulb out. Damaged bulbs should be set aside for immediate use rather than storage.
After harvesting, gently brush off excess soil but don't wash the bulbs. The papery outer layers provide natural protection during storage, and washing can introduce moisture that encourages rot.
Professional tip: If you're using quality secateurs for other garden tasks, consider investing in professional-grade tools. JiveSnip Premium Titanium Garden Secateurs offer exceptional precision and durability for all your harvest and maintenance needs.
Initial Drying and Cleaning Process
Proper initial drying is crucial for long-term storage success. This phase removes excess moisture and begins the curing process that develops the papery outer skin that protects stored garlic.
Immediate post-harvest steps:
- Remove excess soil: Gently brush off loose soil with your hands or a soft brush. Don't scrub or wash the bulbs
- Inspect for damage: Check each bulb for cuts, bruises, or soft spots. Damaged bulbs should be used within days rather than stored
- Trim roots: Cut the roots to about 1cm using clean scissors or secateurs, but leave the stem and leaves intact
- Initial sorting: Separate bulbs by size and condition - the largest, most perfect bulbs will store longest
Setting up for drying:
The first 2-3 weeks of drying are critical. In August's typically warm UK weather, you have several effective options:
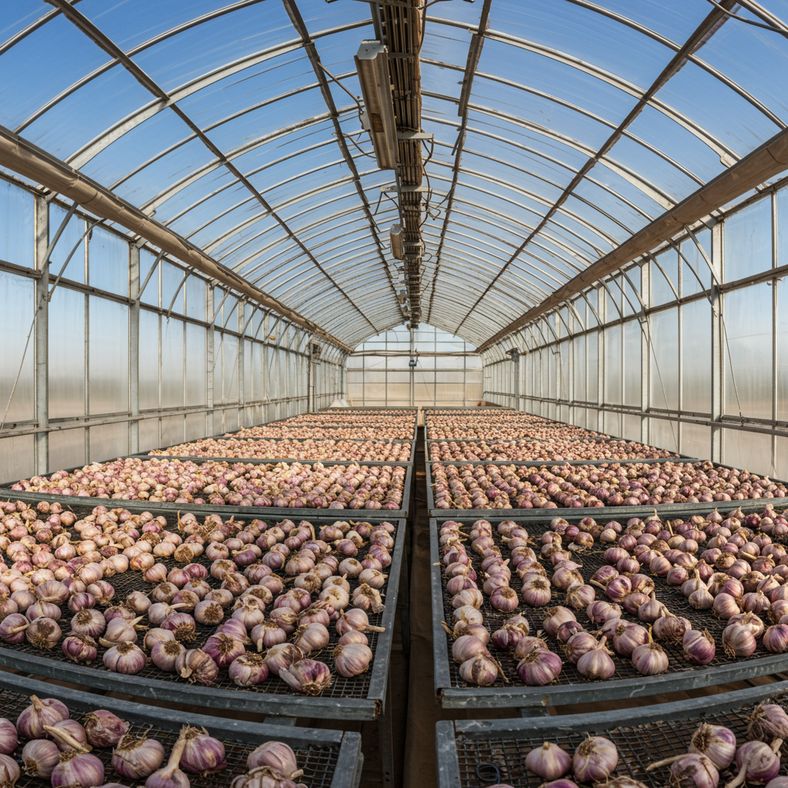
- Greenhouse drying: Lay bulbs in single layers on benches or in well-ventilated trays. Ensure good airflow and avoid temperatures above 30°C
- Outdoor drying: On sunny days, place bulbs on raised mesh screens or wooden pallets. Bring them under cover if rain threatens
- Shed or garage: A well-ventilated, dry space works well if outdoor conditions are poor
- Polytunnel: Excellent airflow and protection, but monitor temperatures carefully in hot weather
During this initial phase, turn the bulbs every few days to ensure even drying. The outer skin should become papery and the neck area should dry completely - this typically takes 2-4 weeks depending on weather conditions.
Long-term Storage Methods

Once your garlic has completed the initial drying phase, proper long-term storage will keep your harvest fresh and usable for months. The storage method you choose depends on your available space, the quantity harvested, and your intended use.
Optimal storage conditions:
- Temperature: 5-10°C (41-50°F) is ideal for long-term storage
- Humidity: Low humidity (60-70%) prevents mold while avoiding over-drying
- Ventilation: Good airflow prevents moisture buildup and fungal issues
- Darkness: Store away from direct light to prevent sprouting
Proven storage methods:
1. Mesh bags or nets:
Store cured bulbs in breathable mesh bags hung in a cool, dry place. This method provides excellent ventilation and easy access. Check monthly and remove any deteriorating bulbs.
2. Wooden crates or boxes:
Layer bulbs in shallow wooden boxes with good ventilation. Don't stack more than 3-4 layers deep, and ensure gaps between bulbs for airflow.
3. Plaiting or braiding:
If you've left stems long enough, traditional plaiting creates an attractive and functional storage method. Hang plaits in a cool, dry location.
4. Paper bags:
For smaller quantities, paper bags with holes punched for ventilation work well. Store in a cool cupboard or pantry.
Storage duration expectations:
- Hardneck varieties: Typically store well for 4-6 months
- Softneck varieties: Can store up to 10-12 months when conditions are optimal
- Spring-planted garlic: Generally stores until mid-spring of the following year
Regular monitoring is essential - check stored garlic monthly and remove any bulbs showing signs of sprouting, softening, or mold development.
Common Storage Problems and Solutions

Even with careful harvesting and preparation, storage issues can arise. Understanding common problems and their solutions helps maximize your garlic's storage life and quality.
Sprouting issues:
Green shoots emerging from stored bulbs indicate either temperature fluctuations or exposure to light. Move affected bulbs to a cooler, darker location and use sprouted cloves promptly - they're still edible but won't store much longer.
Mold and rot problems:
- White mold: Usually indicates too much moisture. Improve ventilation and reduce humidity
- Blue-green mold: Often develops on damaged areas. Remove affected bulbs immediately to prevent spread
- Soft spots: Typically result from harvest damage or inadequate drying. Use these bulbs first
Drying out excessively:
While garlic should be well-dried, over-drying can cause cloves to become hard and difficult to use. If your storage area is too dry, consider moving bulbs to a slightly more humid location or storing in perforated plastic bags within mesh containers.
Premature deterioration:
If bulbs are deteriorating faster than expected, check your storage conditions:
- Temperature too high (move to cooler location)
- Poor ventilation (increase airflow)
- High humidity (improve drainage/ventilation)
- Harvest damage (use damaged bulbs first)
Preventive measures:
- Regular inspection: Check stored garlic every 2-3 weeks
- Rotation system: Use older bulbs first, newest last
- Separation: Keep different varieties separate as they may have different storage lives
- Documentation: Label storage containers with harvest dates and variety names
Remember that some loss is normal - even professionally stored garlic has some wastage. Planning for 10-15% loss helps set realistic expectations for your harvest.
Preparing Garlic for Kitchen Use
Properly stored garlic can be prepared and used in various ways throughout the storage period. Understanding how to process your stored garlic ensures you get maximum value from your harvest.
Processing fresh-stored bulbs:
When removing bulbs from storage, handle them gently and inspect for any soft spots or sprouting. Fresh-stored garlic can be used exactly like shop-bought garlic, but often has superior flavor intensity.
Using sprouted garlic:
If you find green shoots in stored bulbs, don't discard them immediately. Remove the green germ from the center of each clove as it can be bitter, but the remaining clove is perfectly usable and often more mellow in flavor.
Value-added preservation methods:
- Garlic oil: Peel and slice cloves, then preserve in olive oil (refrigerate and use within one week)
- Dehydrating: Slice thin and dehydrate for long-term storage as garlic chips
- Freezing: Peel and freeze whole cloves in small portions for convenient cooking use
- Garlic paste: Process with salt to create a paste that keeps in the refrigerator for several weeks
Maximizing flavor:
Home-grown, properly stored garlic often has more complex flavors than commercial varieties. Use it judiciously at first to gauge strength, as it can be significantly more potent than shop-bought alternatives.
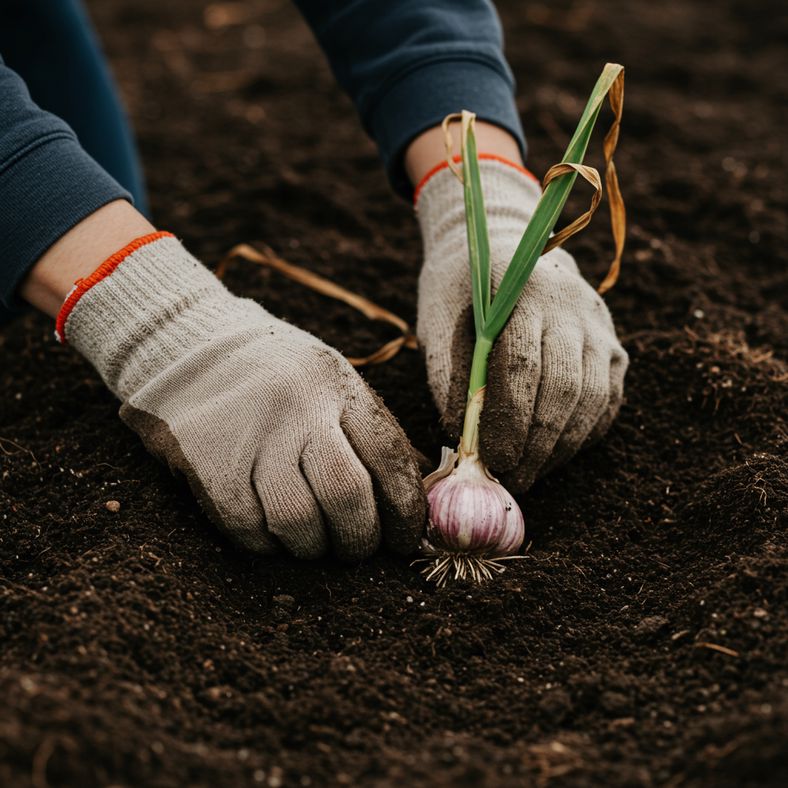
Seed garlic preparation:
Save your best bulbs for planting next season. Choose the largest, healthiest specimens and store them separately in optimal conditions. Plant individual cloves in October for next year's crop.
Kitchen storage:
Once moved to the kitchen for regular use, store garlic in a small basket or ceramic container with good ventilation. Avoid plastic bags or sealed containers, and don't refrigerate whole bulbs as this can encourage sprouting.
Disclaimer: This article contains Amazon affiliate links. We may earn a small commission from qualifying purchases at no additional cost to you.