
How to Clean a Greenhouse Before Winter in the UK
Published 26 August 2026
A step by step autumn clean for UK greenhouses, in the order that saves the most work: empty it, sweep it dry, wash the glazing, disinfect the frame and staging, then clear the gutters, floor and water butt before the frosts arrive.
We earn commission from qualifying Amazon purchases. It costs you nothing and does not affect what we recommend.
Quick Answer
Clean your greenhouse in late September or October, once the summer crops are out and before the first frosts, and work in one order: empty it, sweep it dry, wash the glazing, disinfect the frame and staging, then clear the gutters, floor and water butt. Warm water with a few drops of washing-up liquid does most of the work, and a garden disinfectant finishes the frame channels, pots and staging where pests and spores sit out the winter. Leave the door and vents open for a day or two so the structure dries fully before you insulate it or move any plants back in.
- Pick Your Day and Clear the Greenhouse Completely
- Sweep Out the Debris Where Pests Overwinter
- Wash the Glazing Inside and Out
- Disinfect the Frame, Channels, Staging and Pots
- Clear the Gutters, Floor and Water Butt
- Dry It Out, Fix the Faults, Then Set Up for Winter
- Frequently Asked Questions
- Related Reading
A greenhouse that has just finished a season of tomatoes is never really empty. Leaf litter sits in the frame corners, spent compost lines the stacked pots, algae has crept into the pane overlaps, and inside the glazing bars sit the things that intend to spend winter with you. The RHS is blunt about it: clearing out plant debris, old canes, stakes and plant ties before spring is what reduces overwintering glasshouse red spider mite to a minimum, and greenhouse installers say much the same about whitefly and scale insects sheltering in frame channels.
That is the real argument for an autumn clean rather than a spring one. By late September the summer crops are finished, the weather is still mild enough to stand plants outside for a day without chilling them, and the structure has time to dry properly before anything goes back in. It also has to happen before you insulate, because once horticultural bubble wrap is up you lose easy access to the louvres and vents, and any damp you sealed in stays sealed in. Most gardeners move tender plants under glass around September or October, so the clean has to come first.
What follows is the order of work that saves the most time, what actually overwinters in a UK greenhouse, and the jobs worth doing while the place is empty.
Pick Your Day and Clear the Greenhouse Completely
Set aside most of a day and pick your weather rather than a date. Mild, dry and calm is what you want, and overcast beats bright sunshine: soapy water dries on sunlit glass before you can rinse it off, leaving white streaks that are harder to shift than the dirt you started with. Wind is just as unhelpful, because dust blows straight back onto wet panes. Greenhouse fitters suggest holding out for a day above about 5C.
Why late September into October is the window
- The summer crops have finished, so the greenhouse comes out empty rather than half full of tomato stems.
- It is still mild enough to stand plants outside for a few hours. The RHS suggests around 7C for most tender plants so they are not chilled while you work.
- The glazing gets clean before the darkest weeks. UK daylight falls to as few as seven or eight hours a day in December, and all of it has to pass through your glass.
- There is time for the structure to dry out fully before insulation goes up and plants move in, which is usually around September or October.
Take everything out
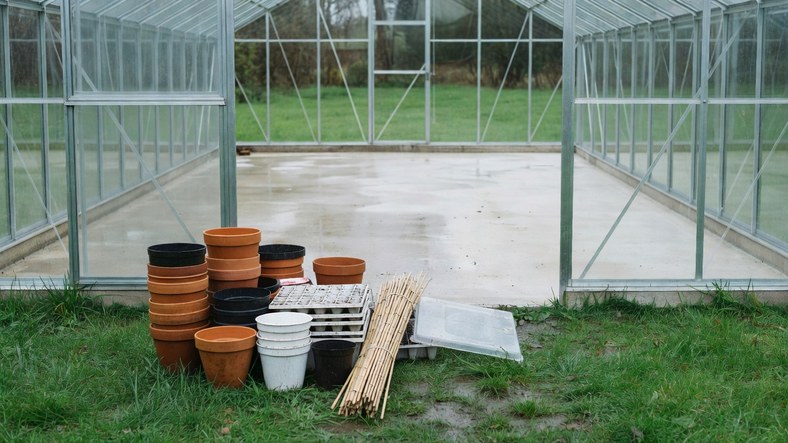
Everything means everything: plants, staging, shelving, pots, seed trays, propagators, canes, compost bags, hand tools, string, wire, blinds and shade netting. Stand plants somewhere sheltered such as against a house wall, cover tender ones with fleece if the day turns cool, or bring them indoors. Compost anything dead or unwanted rather than nursing it through the winter.
Sort as you carry, into three piles: going back in, going into storage, and going out. The old rule of thumb still holds, which is to promise yourself you will not put back anything you do not genuinely need. Keep pots and trays showing mould or disease in their own pile so they get disinfected last.
All those canes, spare trays, cushions and covers then need a dry home rather than a corner of the greenhouse you have just cleared. A lockable, weather-resistant outdoor storage box keeps them off wet ground and stops the clutter creeping back in by November.
On safety: only clean gutters and glazing you can reach easily, have a second person with you if a ladder is involved, never put your weight against the glazing or lean out over the roof, and wear gloves for glass, metal fixings and gutters.
Sweep Out the Debris Where Pests Overwinter
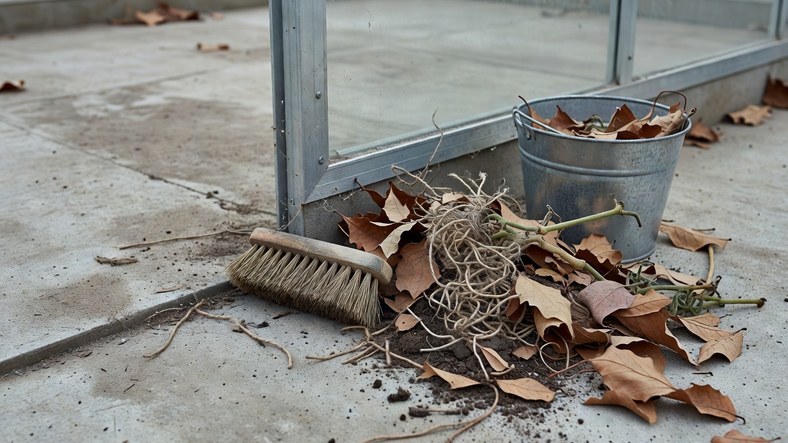
Do all the dry work before any water goes near the structure, because wet dust turns into a paste that spreads into every joint. Start high and finish at the floor: a small stiff brush dislodges soil and cobwebs from the frame, corners and crevices, a long-handled brush sweeps the walls down, and a rake beats a brush if the floor is gravel. Collect leaf litter, plant markers, twine, old canes, stakes, plant ties, spent compost and last season grow bags, and get all of it out of the building.
What is actually hiding in there
This is not tidying for its own sake. The RHS describes mature female glasshouse red spider mites as spending the winter resting in cracks and crevices, in glasshouse frames, stakes, canes, soil and plant debris, and leaving those resting places from late March to feed and lay eggs. They turn orange-red in autumn precisely because they have stopped feeding and gone looking for shelter, and clearing debris, canes and ties is the single measure the RHS names for reducing their numbers.
They are not the only ones sharing the space:
- Whitefly and scale insects tuck into aluminium glazing channels, according to installers who clean greenhouses for a living.
- Grey mould and powdery mildew spores settle on the inside of the glass through the humid summer months and wait there.
- Vine weevil grubs live in old compost, so every stacked pot of it is a nursery.
- Slugs and snails hide around the drainage holes in pot bases, under staging, along rails and in window openings, and are tiny enough when young to squeeze in anywhere.
- Fungus gnats are drawn to decaying plant material and constantly damp compost, which is why the sweep is the actual fix rather than any spray.
Weeds in and around the greenhouse act as hosts for the same mites, so pull them from the base and foundations, including the awkward side facing a wall or fence. That side is also where you spot the gaps and broken louvres that let mice in.
Two things worth putting in place now
Slugs and snails under staging and in stacked pots are far easier to deal with while you can see the floor. Organic-approved ferric phosphate pellets are the usual choice, scattered thinly rather than heaped.
Yellow double-sided sticky traps hung at plant height tell you what is still flying about. They are a monitoring and knock-back tool rather than a cure, but a trap that fills with whitefly in three days is worth knowing before you carry plants back in.
Finally, while everything is dry, scoop the leaves out of the gutters and brush loose debris off the roof with a soft-bristled brush. You will sluice them properly later, once the roof wash has sent more grit down.
Wash the Glazing Inside and Out
Two small jobs first. Divert the water butt so the roof run-off does not reach your stored rainwater, and disengage any automatic vent opener so a vent does not swing open under your brush. If you painted shading on in summer, take it off now: the RHS notes that the coating is washed and brushed off in early autumn, and residue inside comes away more easily with a dry cloth while it is dry.
The method
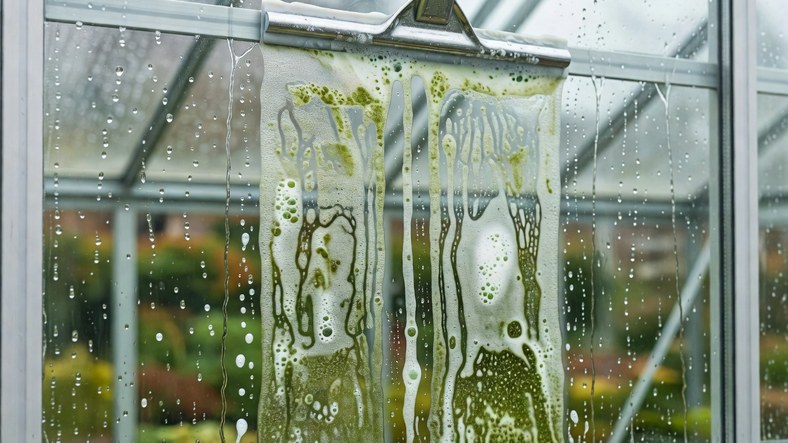
Warm water with a few drops of washing-up liquid is enough. The RHS states plainly that warm water alone is generally sufficient, and specialist glass cleaners optional.
- Rinse the exterior from the ridge down, so dirty water runs over glass you have not washed yet.
- Wash three or four panes at a time with a soft sponge, or a long-handled soft brush for the roof. Let the soap do the work rather than pressing on horticultural glass, which is thin.
- Rinse each section before the soap dries, since dried soap film is harder to remove than the original grime.
- Draw a squeegee down each pane in one stroke, wiping the blade between strokes, then buff with a dry cloth to avoid smears.
- Repeat inside. The interior carries condensation residue, algae, mould spots and the spores you are trying to shift, which is why it matters more than the outside in autumn.
A multi-pattern hose gun earns its place here. Five patterns give a fast fill for the bucket, a fine rose or flat spray for rinsing panes without blasting the glazing clips, and a jet for the gutter, with flow control and a locking trigger.
Do not skip the overlaps. Across the ten to fifteen millimetres where panes meet, algae builds up and wicks moisture into the frame. Slide a thin plastic plant marker into the gap and work it back and forth, spraying soapy water in first on clogged joints.
What not to use
- Pressure washers, which crack horticultural glass, blow glazing clips out of frames and strip the protective coating from polycarbonate.
- Bleach and acidic products, which corrode aluminium frames and seals, and in the case of bleach kill plants too.
- Scourers, wire wool and anything abrasive. Scratched glass scatters light rather than transmitting it.
Polycarbonate wants a soft microfibre cloth, soapy water only, and drying in straight lines. Window cleaner sprays and anything containing ammonia or alcohol cloud it permanently. Green algae inside twin-wall channels is the usual complaint: flush them through if the panel comes off, or work a long thin bottle brush along them, then seal the open ends with aluminium tape. For limescale on glass in hard water areas, diluted white vinegar works, about one part vinegar to four parts water.
Allow two to four hours for a standard six by eight foot greenhouse. Specialists put the light lost to dirty glazing at 20 to 40 percent, and report a clean greenhouse running 3C to 5C warmer than a dirty one on a sunny winter day.
Disinfect the Frame, Channels, Staging and Pots
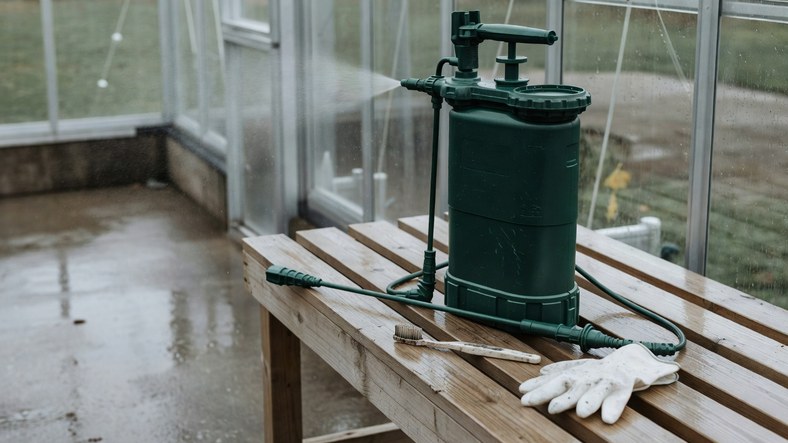
Disinfectant is the second pass, not the first. It reacts with whatever it lands on, so on a surface still coated in soil most of it is spent before it reaches anything alive. Wash first, then disinfect, then rinse.
Whether you need it at all depends on the season you have had. If nothing went wrong, warm water and a scrub really is enough. If you had grey mould, mildew, a whitefly explosion or mites, or you are moving a collection of overwintering plants in, it is worth doing properly.
Choosing something suitable
Work from the category rather than reaching for whatever is under the sink. A horticultural or garden disinfectant, diluted exactly as its label says, is what you want. The traditional phenolic ones are effective and strongly scented, so ventilate hard while you use them; they will also sterilise border soil, though they kill the beneficial bacteria with it. Citrus and citric acid based cleaners are the milder, organic-friendly option. Read the label if you grow organically, keep poultry, or have free-roaming pets.
Applying it
A 5 litre pump-action pressure sprayer is the right tool here. You pump it once, then walk the whole frame with a wand and lance that reach ridge bars and the underside of staging without a stepladder, and the same sprayer refilled with clean water does the rinse. A trigger bottle runs dry and wears your hand out a quarter of the way round.
- Glazing bar channels are the step people skip and the one that matters most. Pop off glazing clips where they come away easily and run an old toothbrush or bottle brush through every channel and along the joints where glass meets frame. That is where mites, whitefly and scale insects sit out the cold.
- Staging gets the top, the underside and the gaps between the slats. Underneath is always the worst of it.
- Pots and seed trays get scrubbed inside and out in warm soapy water with a pot brush, then disinfected and rinsed. Dry them outdoors and store them covered.
- Capillary matting is usually replaced each autumn rather than cleaned.
- Border soil is either sterilised or replaced annually, and plenty of gardeners sidestep the question by growing in bags.
Keep disinfectant off plants and off polycarbonate, and do not let it sit on aluminium: rinse splashes straight away. When you are finished, rinse everything down with clean water, then open the door and every vent and leave the greenhouse to air for at least 24 hours before anything goes back in.
Clear the Gutters, Floor and Water Butt
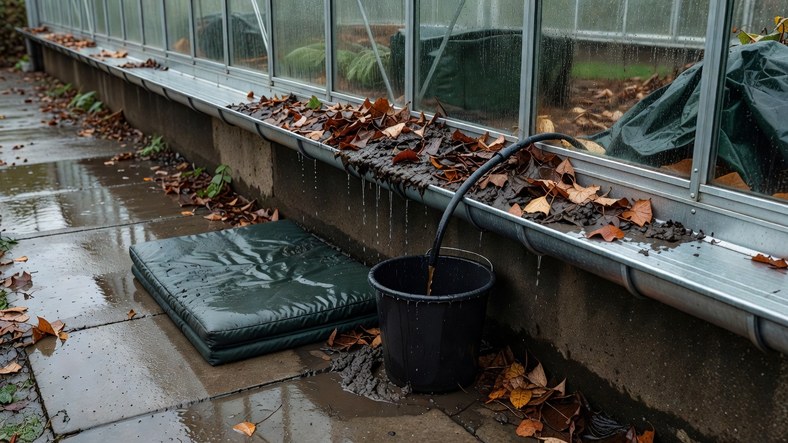
Come back to the gutters now the roof has been washed. The first clear-out took the leaves; this one takes the grit and algae the wash sent down, which is what blocks the fall pipes.
Gutters and downpipes
- Wear rubber gloves and scoop out leaves, moss and sludge by hand into a bucket.
- Check the top of each fall pipe for a blockage and clear it with a straightened wire coat hanger.
- Sluice the run through with a hose or watering can, catching the dirty water in a bucket to tip onto a border rather than sending it into the butt.
The water butt
Autumn is the sensible time, while the butt is at its emptiest and you want it filling cleanly all winter. Empty it, scrub the inside with a stiff brush and warm soapy water, and pour that water down a wastewater drain rather than onto the garden. Rinse it and pour the rinse away too. Check the filter on the rainwater diverter, fit one if there is not one, check the lid still seals, and look for leaves and snails inside.
Floor and perimeter
Scrub a concrete or paved floor with warm water and a stiff brush, working right into the edges and corners where slugs shelter and old compost collects. Gravel floors are more work: lifting and washing the gravel through is the thorough option, and watering a diluted cleaner over it is the realistic one.
Outside, clear the perimeter. Litter piled against the base holds moisture and gives slugs and mice cover, and a clear perimeter is where you notice a cracked pane or a faulty louvre. Block any gap you find, and do not leave pet food near the greenhouse.
This is the longest stretch of the day spent kneeling and standing up again: floor edges, the underside of staging, a bucket of pots and a gutter overhead. A padded kneeler that flips over into a seat with handles to push up on, with a tool bag on the side so brushes and gloves stay with you, takes a good deal of the misery out of it. Leave the door and every vent open when you finish, so the floor dries.
Dry It Out, Fix the Faults, Then Set Up for Winter
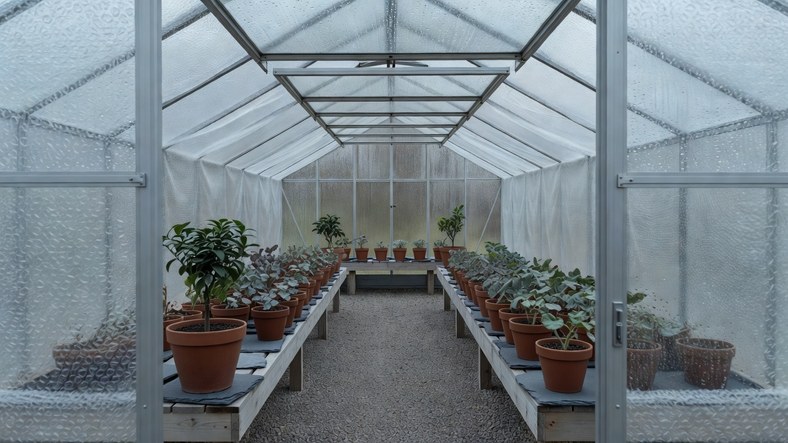
Do not rush the drying. Specialists reckon on a day or two with the door and vents open, and there is a reason to wait: bubble wrap over damp glazing seals in the moisture you just spent a day removing, and once it is up you lose easy access to the vents behind it.
Repairs while you can see everything
- Replace cracked or missing panes, refit sprung glazing clips, and oil vent joints and latches so they still move in February.
- Check door seals, add draught tape or brush strips where cold air gets in, and seal small gaps with silicone.
- Check the wax cylinder in an automatic vent opener. Installers report they fail after three to five years, leaving a vent stuck shut or propped open all winter.
If you do not have an automatic opener, fit one now. A wax-cylinder unit needs no electricity and no wiring: it opens the vent as the greenhouse warms and closes it as it cools, covering the mild late-morning hour when you are at work. The RHS caveat is worth repeating, since the wax takes time to expand: an opener does not replace the door and side vents on a fast-warming day.
Insulate last
Horticultural bubble wrap is the standard because it is translucent and easy to fix. Measure the interior, cut panels to fit, and clip them to the frame rather than taping to the glass. Cover the sides and roof only, never the vents, and keep it clear of foliage. Smaller greenhouses are often wrapped outside and larger ones inside, where the wrap lasts longer but collects condensation against the glazing. Suppliers put the cut in heat loss at 30 to 40 percent, and because wrapping restricts airflow you then need to open the door regularly.
Bringing plants back
Check every plant on the way in, not afterwards. Turn the leaves over and look at the compost surface for aphids, whitefly, vine weevil grubs and the fine webbing that gives red spider mite away, then strip off dead and yellowing foliage, which feeds grey mould. Heavy pots go on the floor and smaller ones on the bench, each on an offcut of wood or slate so air moves underneath and set a hand span from its neighbour, since botrytis spreads by contact in still, humid air. Keep the tenderest plants towards the middle, away from the glass.
The winter routine
Ventilate on mild, dry, frost-free days, ideally late morning once the air has warmed, and close up by mid-afternoon to hold the warmth overnight. Water sparingly, check the compost first, avoid wetting foliage late in the day, and stop feeding until light levels pick up in early spring.
A digital maximum and minimum thermometer turns guesswork into a decision, showing the current air temperature plus the highest and lowest readings since you last reset it, so you learn what happened at four in the morning instead of assuming. The unit we reviewed reads from -20C to 69.9C in 0.1C steps, and measures air temperature only, so do not use it to judge the compost in a pot.
Frequently Asked Questions
Is it better to clean a greenhouse in autumn or spring?
Both work, and the RHS treats it as a spring or autumn job that can also be done between crops at any time of year. Autumn wins if you overwinter anything: the summer crops are out, the weather is still mild enough to stand plants outside for a day, and the glazing is clean before the shortest days arrive. The common pattern is a full clean in autumn, then a lighter wash of the glass in late winter just before sowing starts.
Do I need a disinfectant, or is warm water enough?
For the structure itself the RHS says warm water is generally sufficient, and a scrub with a soft sponge does most of the work. A garden disinfectant earns its place if you had disease or a bad pest year, and for the pots, seed trays and staging that will be handling seedlings in a few months. Clean the surfaces first either way, because disinfectant applied over soil and old compost is largely used up before it reaches anything alive.
Can I clean the greenhouse with plants still inside?
It is much better to empty it, because the frame channels and the corners are exactly the places you cannot reach around a bench of plants. If moving everything out is not realistic, pick a mild day, take out what you can, cover what stays, and keep to a very dilute washing-up liquid solution on the internal glass so nothing splashes onto winter crops. Save the disinfecting for a year when the greenhouse is genuinely empty.
Will cleaning get rid of red spider mite?
It removes a great many of them, which is the best you can do at this point in the year. From autumn the mature females stop feeding, turn orange-red and rest in cracks and crevices in the frame, in canes and stakes, and in soil and plant debris, only emerging again from late March. So the autumn job is removal rather than treatment: clear the debris, canes and ties, brush and disinfect every glazing bar channel, keep weeds down in and around the greenhouse, and do not carry an infested plant back in. Bear in mind they can keep breeding all year if a greenhouse stays above 12C.
Related Reading
- How to Protect Plants from Frost in the UK
- How to Get Rid of Fungus Gnats in Houseplants
- How to Store a Garden Hose Over Winter in the UK
Disclaimer: This article contains Amazon affiliate links. We may earn a small commission from qualifying purchases at no extra cost to you.